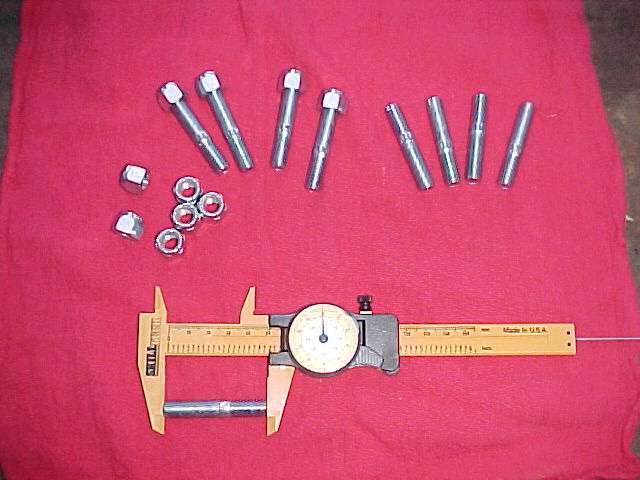
Stud Conversion

Ten studs and ten nylock nuts and you're there!

Feeling Studly?

Being tired of having those bolts come loose on my new locking hubs, I decided I needed a better solution.  At 55-cents a piece, I think I found it.  Think about it, if the bolts come loose, two things can happen.  One, the locking hub will grenade into small parts (that's what got us to the above project in the first place) or two, the loose bolts will wallow in the wheel hub (not the locking hub) which will also need to be replaced!  Either one of these two scenarios would be an unnecessary expense.  Even for the stock hubs this is an inexpensive and worthwhile upgrade.

What to do...

View of the new stud I used for the front hubs. Go to your local auto parts store and get some studs.  They are normally for carburetors and manifolds.  For the 1984 CJ, the threaded holes in the hub are 3/8ths-inch coarse threads.  I used a stud that had both 3/8ths coarse and fine threads.  Total length of the stud needs to be no less than 2-inches.   (You'll see the fine threaded portion is larger than the coarse threaded portion of the stud.)
Using a double nut method to insert the stud. Using two normal fine threaded nuts, place both nuts on the end of the stud and tighten them together firmly.  Clean out the debris from the threaded holes on the hub (with compressed air) and again put a thread locking compound (LocTite) on the coarse threaded end.
How to remove the double nuts without loosening the stud. Insert the coarse end of the stud into the hub, and tighten with a socket wrench.  Watch to make sure the two nuts aren't just rotating on their end of the stud, rather than the stud going into the hub.  Once it is in tight, take an open-end wrench and tighten the one nut that is closest to the hub.  This should separate the two nuts and won't loosen the stud!  Then remove the two nuts and move on to the next stud.
Tightening the nylock nuts. Once all five studs are inserted into the hub, place the locking hub back on and add a washer over each of the studs.  I had to use the thin non-locking washers that came with the Warn hub kit above.  Then place a NEW NYLOCK fine thread locking nut on each of the studs and tightened them all down in a cross-pattern.
View of the finished stud conversion project. When it is all finished, the studs ended up being the perfect length and not exposed.  Hopefully the fine threads and nylock nuts will keep a tighter grip on the locking hub.  It is still a good idea to always check these while you're airing down your tires at the start of an off-road trip.  The whole up-grade cost less than $10 and hopefully will be an improvement.